

When the floors are not at equal level, it not just hampers the whole look of the space but also indicates that something is wrong underneath. Cracked sills, moisture issues or additions being not levelled properly are some of the most common reasons behind floors being out of level. While it is always advisable to call a professional to fix it, knowing the basic techniques, can help you go DIY and save a few bucks.
In this article, we will discuss the details and help you understand the entire process better. So, if you are interested to know how to level a floor, keep scrolling below.
A proper guide to level a floor
There are many reasons behind a floor going out of level but to begin the fixing work, you will have to know the exact reason which has led to floors going out of level in your case. This is because while there are certain general steps to follow, most of the time specific reasons behind floors going out of level require specific techniques to fix the problem. Here’s a general step-by-step instruction guide to level a floor that you should consider:
1. Determine how much the floor is out of level
The very first step that you need to do to level your floor is to use a string, straight edge or a level to determine to what extent your floor is out of plane or out of level with the rest of your home.

2. Inspect to know the root cause
As mentioned earlier, knowing what exactly is causing the problem is crucial. If you are fixing the problem superficially without correcting the main underlying cause, it would become a temporary solution and you will have to repair from time to time. Who knows this might create new complications as well.
So, it is highly recommended that you hire a professional and inspect the foundation of your home and find trouble areas like cracking, rotten wood, mold, excessive moisture, insect damage etc. The inspection should also include testing the subfloor to check for weaknesses in the insulation, drywall and in the various subfloor layers.
Inside your home, you may ask them to look for any kind of water damage or improper additions which needs correction.
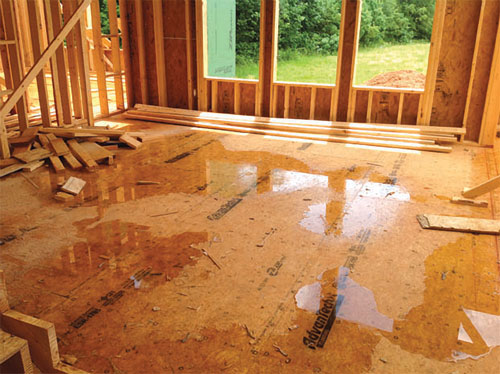
3. Do the repairs
Once the inspection and the diagnosis is done, you will have to do the repairs now. In most cases of damage by moisture or insects in the flooring frame, the affected insulation needs to be torn and damaged band joists, girders and floor joists will have to be replaced.

4. Fix sags
Once you are done with replacing the flooring frame, you need to draw your focus now to the replacement and installation of the sill plates besides fixing the portions where floors joists have got damaged or weakened. The drop girders will help support the floor joist to repair the sagging flooring frame, and for the walls and the floors, the new sill plates will be helpful. Drop girders will also prove beneficial for fixing sagging areas across the floor joists.
As per the dimensions of the crawlspace and the drop girder length you are installing, the strategically placed holes in the understructure might need to be knocked out. Only then can you position the drop girders over the recently fixed flooring frame to create a support to raise the walls and the floor. Once the drop girders are properly positioned, timbers have to be placed on the bottle jacks that are securely placed. After that, the floors may be raised slowly.
Once there is sufficient space, lumber have to be placed in between the walls and the floor. The process of raising the floor and filling the gaps should continue unless you are able to achieve a proper alignment.
5. Time to incorporate the subfloor sleepers
After proper alignment of the walls and the flooring frame is reached and all the weakened spots have been repaired, you should concentrate to achieve a proper height for the recently levelled subfloor. The subfloor sleepers are crucial to avoid the molds and warping. If in your case, the floors have to be raised for a couple of inches, then raising the height of the floor will require subfloor sleepers that are properly angled with the floor. Proper fasteners should be used to secure the sleepers to the floor.

:strip_icc()/sleeper-floor-frame-100424793-8eec8b2b2f924d3aa164d331fdb8d059.jpg)
6. Begin the installation of the new subfloor
Now it is time to place the new tongue and groove subfloor over the sleepers and for that, a good quality flooring adhesive should be used. They need to be fastened into place with the help of screws which have to be big enough to reach the original subfloor through the sleepers. Proper fastening is very crucial to ensure that the new subfloor is tightly secured which in turn is very necessary to avoid frequent squeaks in the near future.
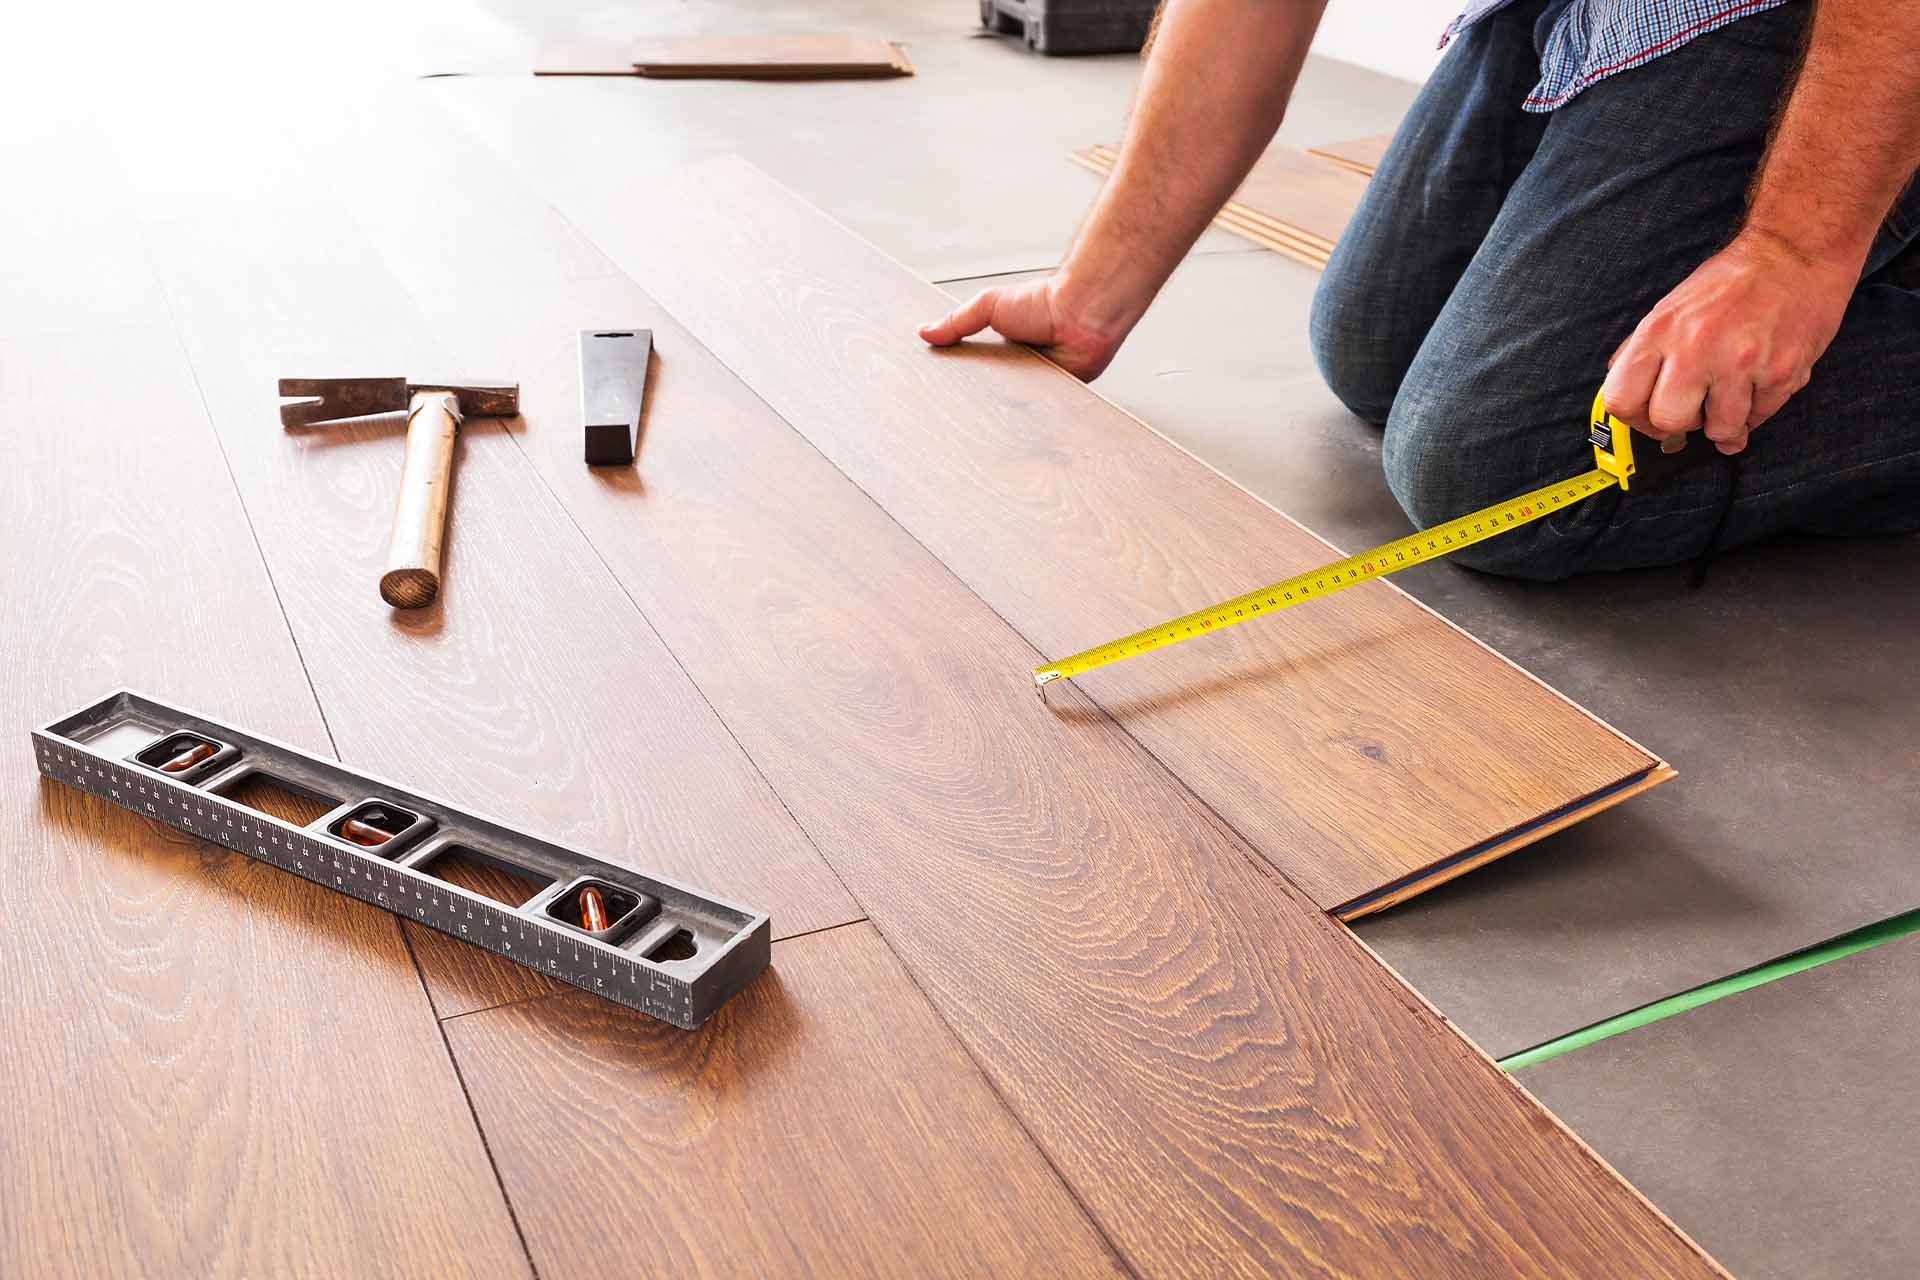
7. Install your floor
You can install the flooring now. However, make sure you have chosen the type of flooring you want to install and have arranged all the materials required from before to avoid any further delay.
8. Finish the work by sealing
Now that you are done with the leveling off the walls and the flooring frame and is able to achieve the desired finished look, get the repairing of the of the bricks or the blocks done that were previously removed. After that, finish the work by sealing the crawlspace tightly. It should also be properly insulated as that is essential to prevent insect infestations and moisture issues.

Conclusion
No matter how frustrating the floors going out of level is, it is a common problem that homeowners face. However, it important not to delay the repairing work because the longer you wait, the more complicated things can get. So, once you notice the floors causing lot of discomfort both to the feet and to your eyes due to uneven level, immediately contact your local professional or get the work done yourself by follow the above-mentioned steps.
